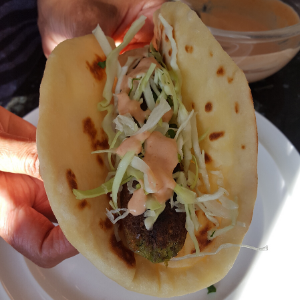
Every cuisine offers exciting vegetarian / vegan options. I love experimenting with different spices and flavours to create my own version of classics from around the world. I served these vegan koftas with flat breads, shredded cabbage with some chopped fresh coriander leaves mixed in and harissa yoghurt.
To make harissa yoghurt, add a tablespoon of harissa to a cup of yoghurt. Squeeze a tablespoon of lemon juice. Mix in a few good pinches of salt and sugar. Mix and serve as sauce for flat breads.
Koftas & Flatbread
INGREDIENTS
100g dried chick peas, washed and soaked in water overnight
2-3 cloves garlic, chopped
75g onions, sliced thinly
2-3 green chillies, chopped
Generous handful coriander stalks and leaves, chopped
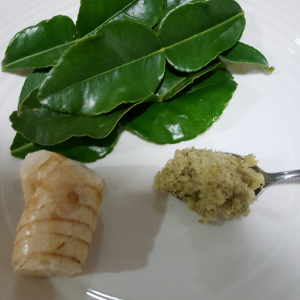
As far as curries go, I love Thai curries. In Thai language, the green curry is called kaeng khiao wan which literally means sweet green curry. There you go green curry is not meant to be fiery hot. Just bursting with flavour from lemon grass, Kaffir lime leaves and coriander roots and stems.
Ingredients for Thai green curry – Galangal, Kaffir lime leaves and lemon grass
Thai people usually make their curry paste in a mortar and pestle as the spices are crushed and so the end result is more aromatic. This can take about half an hour so be prepared! The curry paste makes enough for another curry and I like to freeze any surplus. When you want to use it next time, just bring it to room temperature and just use straight from the jar.
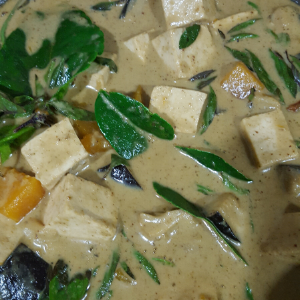
Thai Green Curry with tofu and vegetables
INGREDIENTS
2 tablespoons vegetable oil
4 generous tablespoons green curry paste (recipe below)
400ml coconut milk, shake well before opening the tin
250g extra firm tofu, cut into squares of 3 centimetres or so
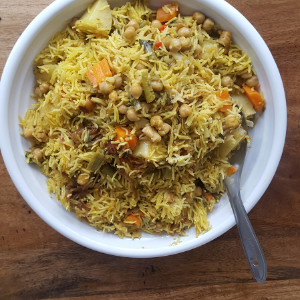
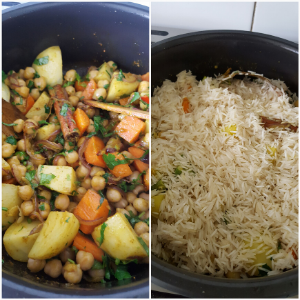
What makes this almost a biryani? I cooked this in the pressure cooker, thereby halving the time. Traditionally biryani is cooked in the oven (low and slow, so the flavours have time to be accentuated). I simplified the process and used whole spices and garam masala instead of making my own spice paste. It is also very unconventional to use chick peas!
Biryan-ish, fragrant rice and vegetables
To make the backbone of Indian spice pastes – ginger and garlic paste, just pound equal measure of ginger and garlic in a mortar and pestle with a pinch of salt.
INGREDIENTS
75g red onion
200g waxy potatoes, cut into eighths
100g carrots, cut into small cubes
100g cut green beans (frozen is okay)
1 x 400g tin of chick peas, drained and rinsed well
45g ghee
1 quill cinnamon stick
5 cardamom pods
1 star anise
4 cloves
2 bay leaves
1 teaspoon ginger, garlic paste
1 teaspoon garam masala powder
1 teaspoon turmeric powder
225g Basmati rice, rinsed well
100ml plain natural yoghurt, whisked smooth
2-3 red chillies, chopped
3 tablespoons coriander leaves and stalks, chopped finely
Salt to taste
10 strands saffron soaked in a tablespoon of warm water
150g onion, finely sliced
2 tablespoons vegetable oil
METHOD
First prepare the caramelized onions. Heat the vegetable oil in a medium sized fry pan. Throw in the onions and a few good pinches salt. Slowly fry them on medium low heat for 20 minutes, turning them once in a while until they are brown, soft and slightly caramelized.
Heat ghee in the pressure pan. Add the whole spices – the cinnamon quill, bay leaves, star anise, cloves and cardamom. When the spices bloom and smell fragrant, add the sliced red onion. Fry for three minutes, add the ginger, garlic paste, chillies and coriander leaves, followed by garam masala and turmeric. Fry continuously for a minute and toss in the vegetables including the chick peas. Keep frying so the spices coat the vegetables well. Spoon the yoghurt and salt and mix well. Cook for a couple of minutes.
The vegetables first and then rice on top for Biryan-ish
Spoon the rice so the vegetables are completely covered. Top with caramelized onions and pour over the saffron strands. Gently pour 300mls of hot water along the walls of the pressure pan so as not to disturb the vegetable base. Cover with the lid and turn the heat to high. Cook on low heat for five minutes after you hear the first whistle. Allow the pressure cooker to cool completely.
Turn over the biryani onto a serving platter. Serve hot with plain yoghurt and pickled onions.
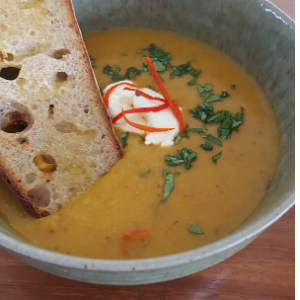
This is perfect for a winter’s day. The spices are warming and it is a creamy, hearty soup. It’s the kind of soup you need to keep the winter ills away!!
You can use canned chick peas but somehow I prefer to use the dried ones. Use 2 x 400g cans of chick peas, drained and rinsed well. This recipe was inspired by Delia Smith’s Winter Collection.
Chick pea soup
INGREDIENTS
225g dried chick peas, soaked overnight in twice their volume of cold water
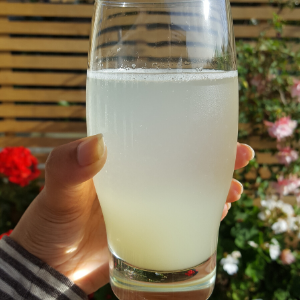
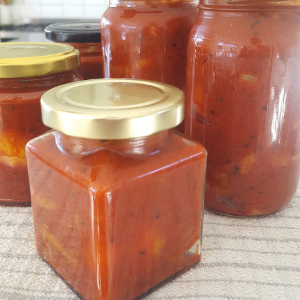
I remember my mum attending some workshops on food preservation when I was about 10 or so. From those classes, there was always homemade tomato ketchup, pineapple jam and some kind of cordials. We used to call them squash and hardly anyone uses that term anymore. The other day I wanted to buy a cordial and all the options had a very small percentage of actual fruit and the rest were fillers plus preservative! So I decided to make my own based on the memory of what my mum used to make. This can be had cold with soda or hot with water. I used Meyer lemons as the juice isn’t too tart. You can also scale the recipe up.
Lemon Ginger cordial
INGREDIENTS
1 cup sugar
2 cups hot water from a freshly boiled kettle
100g ginger, peeled and grated fine
Rind of one lemon
1 cup lemon juice (about 6-8 lemons)
1 teaspoon corn starch, mixed with a couple of teaspoons of cold water
METHOD
Measure out the sugar in a small saucepan. Pour the hot water in and turn the heat on. Let it simmer for 5 minutes. Stir from time to time to prevent sugar from clumping.
Toss the ginger in. Mix and turn the heat off after two minutes. Throw the rind into the saucepan and let steep for five minutes.
Strain the liquid through a fine mesh strainer. Pour in the lemon juice. Stir to combine and add the corn starch water. Put it back on the heat until liquid becomes slightly cloudy.
Lemon ginger cordial
When cool, bottle the cordial. Refrigerate and use within four weeks. Makes 3 cups cordial.
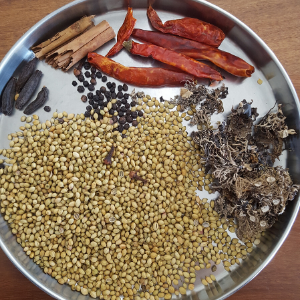
Mangalore is a port town just off Goa on the west coast of India. The cuisine of Mangalore is very distinctive and reflects the diverse communities of this region. Coconut and curry leaves feature heavily as the food here is influenced by South Indian cuisine.
I have used a rather uncommon spice in my version. It is called stone flower (Pathar ke phool in Hindi or Rathi puvvu in Telugu – it is a dried lichen with the scientific name of Parmotrema perlatum. This has a distinct floral aroma and used generally in meat stews but works well in this dish.
Spices for Kori Gashi – the stone flower is on the right next to coriander seeds
INGREDIENTS
1 kg boneless chicken thighs, cut in half
100g onion, chopped
1 sprig curry leaf
1 teaspoon black mustard seeds
4 tablespoons coconut or vegetable oil
150g grated coconut, (if frozen, thaw first)
4 plump garlic cloves, peeled and coarsely chopped
5 centimetre piece of ginger, peeled and coarsely chopped
Pickling is a way of preserving vegetables and fruits. Pickling likely first originated in the Indus Valley Civilization in northwest India around 2400 BCE.
The pickles in South Asia are different to pickles in the rest of the world. Mustard, chilli powder and some fenugreek are the most commonly used spices. South Indian pickles do not use any vinegar and the preserving agent was mostly salt and oil – so anaerobic if you want to get scientific.
Growing up in India, we had a distinct “pickling” season. Mostly mangoes were pickled during the height of summer in May. I fondly remember the time when mum shopped around for the best chillies and mustard along with mangoes, the variety being specific for the type of pickle she wished to make. In addition to mangoes, there was lemon, tomato, sour greens, fresh red chillies and gooseberry later in the year to be pickled. The pungent smell of ground mustard and chilli would linger in the air for a few days with the promise of taste tests in the ensuing days.
Andhra style lemon pickle
My lemon pickle recipe is a Westernized version and I like to make it because it adds zing to the blandest food. Believe me, it is most comforting to eat lemon pickle and steamed rice when you are recovering from the flu.
Have you ever wondered where flat breads originated from? To cut a long story short, I will just attribute their origin to Egypt. Isn’t it remarkable that over the centuries they have been morphed and now several countries have their versions of flat breads? In India, we have specific names – chapati, paratha, kulcha, puri, naan , phulka – they are all flat breads but prepared differently.
Just a word about how much water to add. In my recipe, please note it is approximate as the amount of water needed depends on the flour and humidity in your location. Add a little at a time, that way you will have the right consistency for the dough. When you are making them ahead of time, stack them one on top of the other, wrap in foil and reheat in a warm oven.
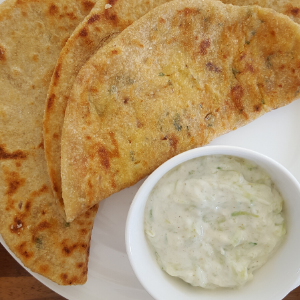
This is affectionately referred to as “breakfast of champions”. In Punjab, people tend to have aloo paratha with some natural yoghurt on the side for breakfast. I prefer to make aloo paratha for lunch and serve with a simple cucumber raita.
Aloo Paratha
INGREDIENTS
400g atta (special flour you get from an Indian grocery store)
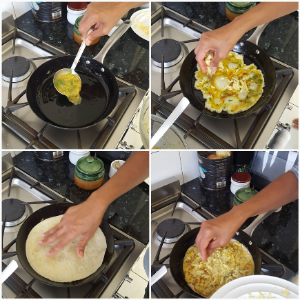
These quesadillas are great at breakfast, lunch or brunch. They are so satisfying and I bet it will become a favourite for you as well. These are made with wheat flour tortillas and as a guide, it is one egg per one tortilla. These are best eaten straight out of the pan, so the maker gets to eat last!
My son made these for me for lunch a few months back and I just loved them. Here is his recipe.
Making of egg quesadilla
INGREDIENTS
8 eggs
2-3 jalapenos, finely chopped
50g red onion, finely chopped
½ cup of finely chopped coriander stems and leaves
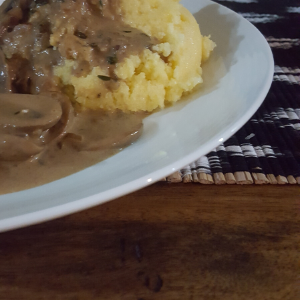
I love mushrooms in any form. Mushrooms are rich in B vitamins, are excellent sources of micro elements like selenium and copper and rich in antioxidants. For as long as I remember I used to make mushroom ragout with cream and in my quest to make more of my recipes plant based, I experimented with options and came up with this recipe as it has the richness and creaminess of cream but it is vegan.
I find instant polenta is easier to work with and does not get lumpy as easily. In my experience I have always found that it requires way more water than recommended on the packet. Another trick I found is that if your polenta is too runny, then cook for longer. The creamy polenta is not vegan as I add some grated parmesan cheese in the end. Maybe you can omit the parmesan and see if you like it.
Mushroom Ragu with Creamy Polenta
INGREDIENTS
500g mushrooms, cleaned and sliced 4-5mm thick
50g shallots, chopped
100g onions, finely diced
10g dried shitake mushrooms
1 teaspoon Marmite
50g cashew nuts, soaked for 30 minutes in 200ml hot water
2-3 cloves of garlic, finely chopped
3 tablespoons extra virgin olive oil
2-3 sprigs of thyme
2 tablespoons brandy
½ teaspoon brown sugar
Salt and pepper
2 cups or 300g instant polenta
30g butter, cubed
30g parmesan cheese, finely grated or on microplane
METHOD
Rinse the shitake mushrooms and soak in 50ml hot water from a freshly boiled kettle for 15-20 minutes. Set aside.
Blitz the cashew nuts along with their soaking liquid in a food processor until creamy. In a small jar of food processor or spice grinder, add the shallots, shitake mushrooms including the soaking liquid and marmite. Process to a fine paste.
Heat the extra virgin olive oil in a large fry pan. Fry the onions, thyme and garlic for 8-10 minutes. Toss the mushrooms in and mix well so that the aromatics stick to the mushroom pieces. Increase heat to a high and pour in the brandy. Be very careful and set the alcohol alight by using the flame from the stove or lighting a match. Once the alcohol has burnt off, lower heat to medium and fry the onions. Season with salt and pepper.
Once mushrooms look cooked, add the shitake mushroom paste and sugar. Mix well and check for seasoning adjusting as needed.
Pour in the cashew nut cream. Mix well and if sauce is too thick, add hot water spoon by spoon until desired sauce consistency is achieved. Fish out the thyme before serving. Keep warm while you prepare the polenta.
Cook the polenta as per instructions on the packet. Remove from heat and stir in the butter. Once butter cubes are incorporated, you can mix the parmesan cheese.
Serve a scoop of polenta and top it with the mushroom ragout. Serves 4 as a main meal.