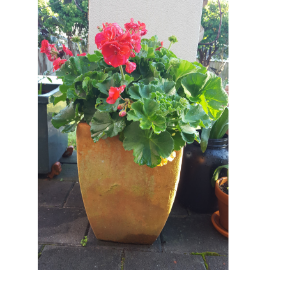
TIPS TO GROW YOUR OWN SUMMER VEGES IN CONTAINERS

Just wanted to put it out there that you don’t need a large section to be able to grow some of your produce. Depending on the size of your family and what you like to eat, you can have a very productive garden in a limited space. All you need is an interest and a will to grow.

I have significant garden space but like all gardeners, I too want to maximize space. I have set up container gardening on my patio and it is so nice to be able to literally see my vegetables grow in front of my eyes.

I have eggplants, grafted tomatoes, bush beans and cucumbers amongst other stuff. I also have a fig tree, a dwarf peach tree and a blueberry bush in containers. With all container gardening, you must water every day and if in a terracotta pot, perhaps twice a day. When filling your container, use good quality potting mix with a slow release organic fertilizer and water crystals. Also mulch the surface to prevent moisture loss. All summer vegetables need at least 6 hours sunshine and temperature in the mid 20’s. They are hungry crops and big feeders! Water, feed, harvest, repeat!
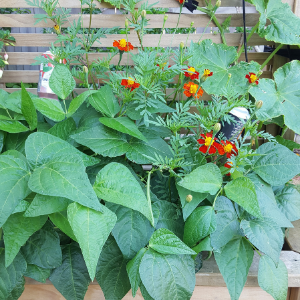
Marigolds are good companion plants for bush or dwarf beans

Bush beans or dwarf beans are very easy to grow. They germinate in a week and from seed to harvest in about two months. To make harvesting easy, plant bush beans in a raised bed, close to the edge so the beans kind of hang out and you can see them. Make sure you plant 10 or so plants so you get a good weekly supply through the season.
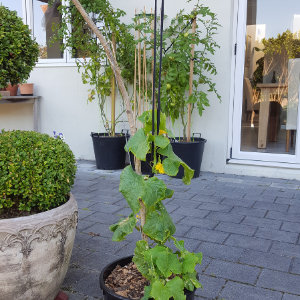
Training cucumber up the pergola

Grow your cucumbers vertically – this way they occupy less space. I am growing mine onto the pergola. Trim the bottom leaves and gently nudge the vine along to grab onto a pole or stake.
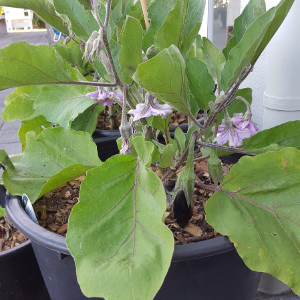
Grafted eggplant

This year I have planted grafted eggplants and tomatoes for the first time. The eggplants are full of flowers and look very promising. Grafted really helps in these coastal temperate zones where summers can be short. Eggplants need at least five months of warm sunny days to bear fruit and grafted reduces that time down to half.
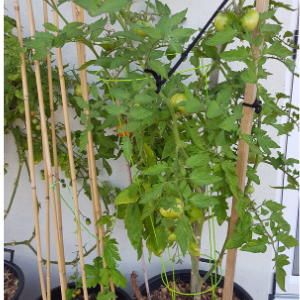
Grafted big beef

I have a cherry and a big beef tomato. I have Oxheart and Andiamo and different kind of cherry tomatoes in the beds. The cherry tomato has outgrown the cage and I have done a rough weave to help it reach the pergola.
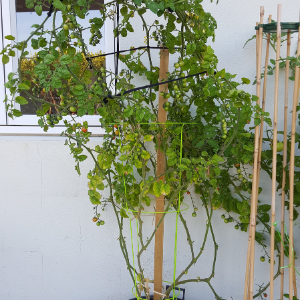
Training the cherry tomato up the pergola

Here are some growing tips for healthy tomatoes.

Snip the laterals regularly. Laterals are the little leaves that appear up the stem of your tomato plant. Pinching off laterals will allow the trusses of fruit to develop better, and promotes better airflow.

Tomatoes need full sun and love to be watered. They need to be well watered so that they don’t dry out. The more you water your tomatoes, the juicier your fruit are going to be.

Tomatoes are super hungry plants. Every couple of weeks, give them a good boost with some fertiliser in the watering can and you’ll be good to go for the season.

Remove bottom leaves – as your plant begins to grow, it no longer requires the bottom leaves. They tend to rot, so best to remove.

Blossom end rot – the three dreaded words when you are trying to grow tomatoes. The spot on the fruit where the blossom once was marks the centre of blossom end rot. Typically, the problem starts on the first flush of fruits and those that haven’t quite reached their full size. The spot appears watery and yellowish brown at first and will grow until it destroys much of the fruit. Other vegetables like eggplants can be subject to blossom rot as well. What blossom end rot is telling you is that the fruit is not receiving enough calcium, even though there may be ample calcium in the soil and the plant’s leaves.

Consistent watering is key. Remember to never ever water from above, but always water tomatoes at ground level. You may want to place some organic mulch around the plants to retain moisture. Tomato end blossom rot will usually affect the first round or two of fruits. Although blossom end rot can leave the plant vulnerable to disease, it is not a contagious condition and won’t travel among the fruits, so unless you find you have a severe calcium deficiency, there’s no need for sprays or fungicides. Removing the affected fruit and continuing with a consistent watering schedule may clear the problem for the fruits that follow.

Happy Gardening!

MYPICKS FOR EASY TO GROW VEGETABLES

I have been a gardener for as long as I remember. Growing up in India, we grew an extensive range of vegetables (eggplants, beans, gourds and greens), fruits (guava, banana, mango and lemon) and flowers (gerberas, jasmines, solidago, zinnia and sunflowers). It was basic back in those days but we maintained a compost heap, made our own oil cake and cow dung tonic for the plants.

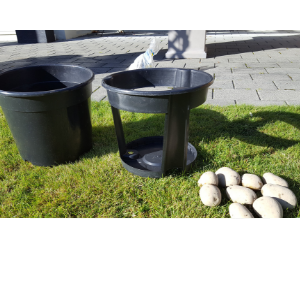
The beauty of gardening is that with a little effort and some patience you will be rewarded for your handiwork. You need some basic equipment and the rest you can manage with whatever is available at home. You can upcycle if you have the skills or do what I do just repurpose everything. For example, I go to a tyre shop and ask for old tyres – line them up with lots of old newspaper and fill it with potting mix and you have yourself a good space to grow vegetables. Cardboard boxes are also good to grow annuals or herbs. Drill some holes into an unused bucket and you have a pot!

When the weather is conducive, go and get yourself some seed packets or seedling punnets along with some potting mix or compost. I find it is best to invest a bit more in organic because not only do they improve your existing soil but also provide nutrients that last more than one planting. The plants require less watering as the soil has better moisture retaining capability. You will also need a liquid fertilizer like a sea weed tonic.

TIPS FOR SUCCESSFUL GROWING

Plant late evening so seedlings shock is reduced

Soak seedlings in seaweed tonic before transplanting – this makes them settle in faster in their new surrounds.

Spacing between plants is important – as a general rule of thumb, leave two hand spaces between plants.

Overcrowding causes plants to rot or they won’t have enough space to grow to full potential.

Prepare, Plant and Nourish!

Continue reading “MYPICKS FOR EASY TO GROW VEGETABLES”

HOW I CONVERTED MY BACK LAWN TO AN EDIBLE GARDEN

I am probably going to upset some people by saying that lawns are the biggest waste of resources – money and space mainly. I wonder why we are so obsessed with having a lawn when we can use that space to grow fruits, vegetables, herbs or even cut flowers and be a little bit self-sustainable. I have always been interested in gardening right from a very young age – but didn’t have the confidence to drastically convert the back lawn to an edible garden.

During lockdown, it felt really nice harvesting some spring onions, salad greens, feijoas and mandarins from our garden. My project took seed when I wanted to take it up a notch and challenge myself to growing more. The next step was reading about permaculture, urban farming and following some pro gardeners like Charles Dowding (No dig beds) and Mark Valencia (Self Sufficient Me).

Below are the steps I followed.

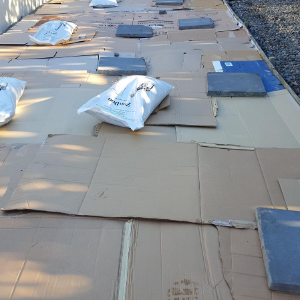
Cover the area with cardboard

Measure the area you have and monitor how much sunshine your designated patch gets. Note whether it is morning or afternoon sun. Most vegetables require between 6 -8 hours sunshine. The area I wanted to convert was about 80 square metres. My garden has a micro climate of its own because of the type of vegetation I have grown over the years – it is warm, sheltered to a certain extent from wind and frost.

 Draw up plans on a piece of paper and colour in the details to see how it is going to look. Make a rough estimate of costs and budget. I wanted a mix of “no dig beds” and planter boxes. I did a drawing as this helped to conceptualize – great tool for evolution of that rough idea. Initially, my husband was going to build the planter boxes but then I found good quality ones I was happy with https://www.steelmates.co.nz/ They do come as a flat pack and requires about half an hour to assemble.

Consider how you are going to irrigate your beds. I love hand watering because it is a great time to reflect on life in general and also monitor the health of your plants. (You can think about collecting rain water in barrels). You can be vigilant to notice pests and diseases before they kill your precious plants.

I set up a compost bin so I get a regular supply of good quality compost for the beds. Compost takes three months! Last year I set up a worm farm and the worm tea /castings are a good source of organic nutrients for your plants.

No dig beds

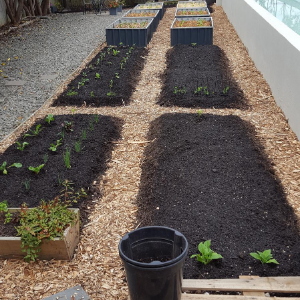
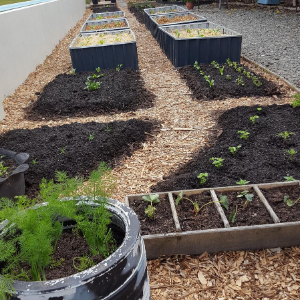
I ended up with six planter boxes about 1.75metres by 1 metre (approximately) and then 4 large and 4 small no dig beds. I decided to prepare the entire area as if I was going to do a “no dig bed”.

Raised planter boxes

If you want to be successful with an edible garden, it means you have to be committed to caring for the soil and the general environment. You improve the soil health by putting compost and such organic materials that will help build a rich medium for plants to grow. Good soil must be free draining and also retain enough moisture and water without becoming boggy. Free draining soil also has vital microbes and fungi that help the growing medium thrive. Getting good quality soil is the biggest expense/ investment. Like the name suggests with a no dig bed, there is no digging or tilling of the soil. First you get rid of the lawn by covering it in cardboard. You can pick up cardboard at a paper recycle station or ask at your local electronics, furniture store. Remove all staples, sticky tape and labels. Mow your lawn and then cover the entire area with thick layers of cardboard.

Wet the cardboard.

I used the compost, bark mulch from Zoodoo. They “harvest” the hoof poo from the zoo and convert to this rich compost and tub mix.

After placing my planter boxes in position, I used wood chip for paths. To fill the planter boxes efficiently, I used tree trimmings (from my garden and old leaves) as base material along with wet newspapers / cardboard. Then I filled with some coarse base (sold as forest floor at Zoodoo) and topped with bark mulch, compost and tub mix. I used the same formula minus the tree trimmings for the no dig beds.

Finally used pea / barley straw as mulch. Water well and let them settle for a couple of days before planting.

I wanted to break in the beds and so planted winter growing brassicas (broccoli, cabbage, cauliflower, kohlrabi, kale) for a late spring harvest and also some herbs and salad greens.

In terms of time, I estimate it took me about 150 hours in total. I did have some help from my family. I used just under 11,000 litres (11 cubic metres) of compost / soil / bark mulch combined which was about half the total spend on this project. I also used a cubic metre of wood chip for the pathways. I can say it is more or less complete and I spent about $4,000 to convert 80 square metres into an edible garden. I will keep you updated on good performers and what didn’t work so well.

I also wanted to mention that there were no sponsors – just recommended what I used because I was satisfied with the product.

GLORIOUS HERBS AND HOW TO GROW YOUR OWN

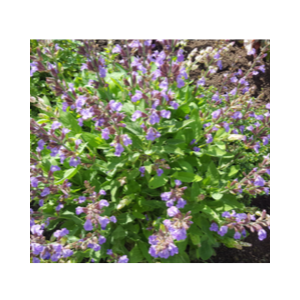
Sage in full bloom

I use a lot of herbs in my cooking and prefer to grow my own because that way I can avoid the plastic pollution and harvest only what I need. Also herb plants when they flower attract a lot of bees in the garden but you want to encourage flowering towards end of season.

I am tired of paying $3 for a small packet of herbs preciously wrapped in plastic at the supermarket. In addition to the ones listed below I also grow chives, curry leaves and borage (mostly for the flowers – they make an excellent garnish).

Follow my tips and you will be harvesting fresh herbs all year round.

HERBS 101

1. GROUP THE HERBS

Oregano and thyme together makes sense but mint is the impostor here!

Group herbs according to their drought-tolerance level.

Mediterranean stalwarts rosemary, thyme, sage and oregano don’t need as much water as leafy herbs such as coriander, mint and basil.

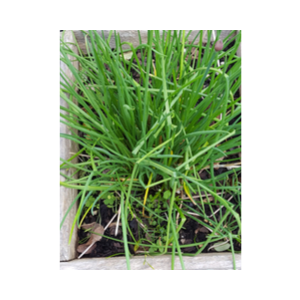
Garlic chives

2. GIVE THEM SUNSHINE

Almost all herbs prefer full sun, so site your herb garden accordingly.

Just remember that coriander and parsley tolerate shade, and mint, lemon balm and chervil actually relish it.

3. CLIP REGULARLY

Even if you’re not going to use the herbs, a regular clipping will ensure a continuous supply of new leaves and help control rampant growth. Cut chives and mint right back to within 3cm of the ground.

4. CONTROL FLOWERING

Flowering herbs may be attractive and do attract bees – but if you want a continued supply of leaves, nip off the flower heads. That’s particularly important for basil, chives, mint, oregano and thyme.

There is plenty of history surrounding the culinary use of herbs. Most have some kind of medicinal benefit and I have included some of the interesting history.

Here is my pick of 8 herbs that are easy to grow and are essential to good cooking:

PARSLEY / ITALIAN PARSLEY

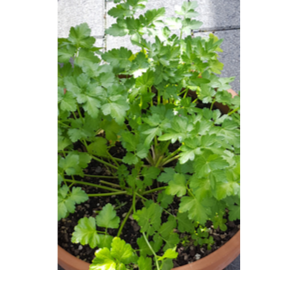
Italian Parsley

Parsley is native of Sardinia. Did you know that parsley is mentioned in Homer’s Odyssey?

I tend to use parsley for parsley pesto as well as gremolata. I use Italian parsley for salads too. Parsley needs plenty of feeding and regular watering to produce lush green leaves. If it gets too dry it’ll go to seed.

You can raise parsley from seed. But germination takes a long time – sometimes more than a month – and can be patchy. If you’re buying seedlings look for small plants in individual cells. This will mean the roots are disturbed as little as possible when you plant them out.

Tip: Remove the outside leaves to encourage growth from the centre.

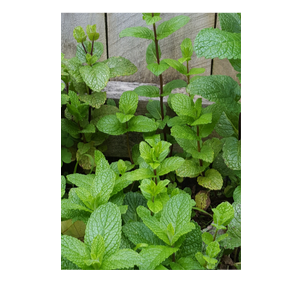
MINT / VIETNAMESE MINT

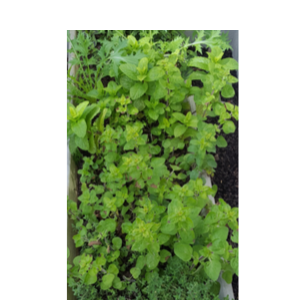
Mint and more mint!

Mint originated in Ancient Greece. Vietnamese mint has a sharp peppery taste and is extensively used in South East Asian cuisine.

Mint grows best in moist rich soil in partial shade. Its underground runners can spread throughout the garden – so keep it contained in a plastic pot (30cm diameter) sunk into the ground. Cut the bottom off the pot first.

Over time, the stems will head for the edges and leave the centre bare. So dig up the pot every 2-3 years and replant young rooted sections of stem.

Tip: Mint is susceptible to rust (brown spots on the leaves). Trim it to 3cm above the soil to promote new rust-free growth. If this doesn’t work, get rid of the plant (not on your compost heap) and start again in another area of the garden.

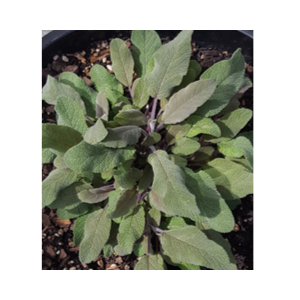
SAGE

Purple leaf sage

Sage is a member of the genus Salvia, of which there are 700 members. The plant has been held in high regard as a herb – both for its culinary uses and its health giving properties. Romans grew sage wherever they travelled as they believed the herb to prolong youth!

Sage is temperamental and while it is a perennial, it can get affected by frosts so perhaps grow it in a pot, in full sun as an annual.

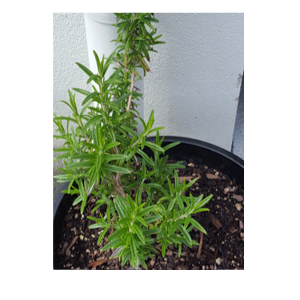
ROSEMARY

Rosemary

Rosemary is a herb that is rich in myth and symbolism and sacred to friendship. “There’s rosemary, that’s for remembrance. Pray you, love, remember,” says poor mad Ophelia in Hamlet.

Rosemary is good with roast potatoes and an excellent match for breads and pizzas.

Rosemary requires lots of sunshine and little water. Upright ones are better than trailing ones for cooking. Best to pick often and not let it get leggy or woody. At the end of season, prune hard.

THYME

There are many varieties of thyme, some very attractive but with little flavour. In its wild version the plant forms dense little cushions, and it is wonderful to walk on sun-crisped thyme. When we visited Bannockburn in South Otago, New Zealand, there was wild thyme growing alongside the road.

The best varieties for cooking are common thyme, lemon thyme, caraway thyme and pizza thyme. The flavour is so savoury and almost peppery.

Tip: In winter trim the bush back by about two-thirds.

OREGANO / MARJORAM

Both belong to the Origanum species, belonging to the mint family. Put simply, oregano is the wild form of marjoram.

Origanum means “joy of the mountains”. I find that fresh oregano smells very different to the dried oregano. The depth of flavour of fresh oregano depends on the amount of sunshine and water they receive.

Oregano, like rosemary and thyme, needs full sun and a soil that’s not too fertile to develop the essential oils that give the leaves their pungent flavour. It’s a spreading plant – so allow it a space about 30cm in diameter and trim it regularly to keep it bushy and encourage new growth.

The plants will grow for several years. But they need rejuvenation every 3-5 years to keep them compact and productive. Dig up the plant in spring, divide it and replant a shoot that has good rootlets.

Tip: There are several varieties of oregano – true Greek oregano has the best flavour.

BAY LEAVES

Laurus nobilis is the botanical name and I mention this because of this interesting bit of trivia…

Poets were crowned with “laurel” and hence poet laureate and in the Middle Ages, those students passing their first University exams were bacca laureatus.

Originating in the Mediterranean, the sweet bay is a dense evergreen with glossy leaves. It is an appropriate gift for those moving to a new home or starting life together.

Grow in well-drained soil with an incorporation of generous amounts of compost. They are slow growing and suited to containers.

CORIANDER

Originated in Iran and belongs to the same family as parsley and dill.

Coriander doesn’t like being transplanted and prematurely bolts to seed. Always grow coriander from seed.

I like growing coriander as microgreens. The trick is to keep moist and use regularly. They will be ready for use in 2-3 weeks.

Coriander flowers are an important food source for beneficial insects, especially little parasitic wasps and predatory flies.

So to attract many beneficial insects you want lots and lots of coriander flowers in your garden.

THINGS TO DO IN THE GARDEN IN EARLY SPRING

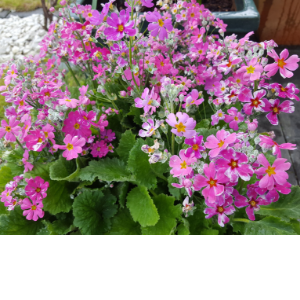
Pretty in pink, Primulas

In the garden world spring is a magical time. It is still quite cold but the plants got the memo that it is September and it means that they all need to come out of dormancy and burst into tender green shoots. The deciduous plants are still leafless but I can see them all busy, shooting out tiny leaves. I have often wondered how plants sense that the days are getting longer and they can come out of their slumber. This makes me more in awe of Nature.

Continue reading “THINGS TO DO IN THE GARDEN IN EARLY SPRING”

HOW TO LOOK AFTER YOUR HOUSE PLANTS

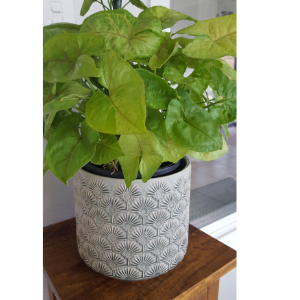
Syngonium podophyllum

House plants have become a topic of conversation lately as people are reconnecting with all things nature and organic. They have always been a design feature and for me it makes my house look fresh and stylish. If you choose the right plant, they can be relatively low maintenance and the plant sings out your green fingers. I believe nurturing house plants is a win / win situation – if you have enough large house plants, they remove volatile organic compounds from an indoor environment. Indoor plants offer the joy of taking care of something and seeing it respond and connecting to the plant that way helps in our own personal growth.

10 Hardy Indoor plants

ZZ plant/ Zamioculcas

Heart leaf Philodendron vine/Philodendron hederaceum

Peace Lily / Spathiphyllum

Devil’s ivy / Pothos

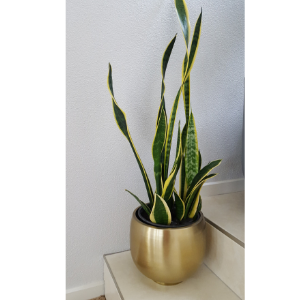
Mother-in-law’s tongue or snake plant/ Sansevieria trifasciata

Mother-in-law’s tongue

Swiss cheese plant / Monstera deliciosa

Rubber tree / Ficus Elastica

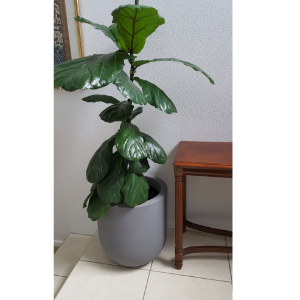
Fiddle leaf fig / Ficus lyrata

Fiddle leaf Fig

Radiator Plants /Peperomia

Cactus / Cactaceae

Some such as fiddle leaf fig, Swiss cheese plant, Rubber tree and Philodendron can get very big. If you are a novice at growing, you are better to get a full sized one or if you have a bit of experience, you can get a smaller one in spring and nurture it to full size.

Now that I have my plants what next

Get yourself off to a good start by buying the right plant for your space and lifestyle.

I like to place a used kitchen sponge or kitchen cloth between the pot and the saucer. I believe this retains some of the moisture and prevents the roots drying out.

The plants mentioned above like to dry out between waterings which is why they are user friendly. They will thrive best with bright, indirect light. You can group two or three plants together and make a living sculpture.

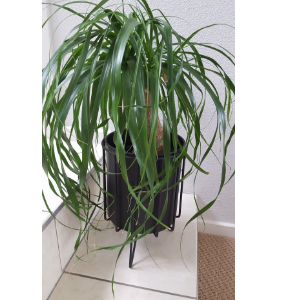
Ponytail Palm

Tips to take care of your plants

 Make yourself a routine of inspecting the health of your plant and watering on a regular basis. Perhaps in the initial stages you can make a time on your calendar until it becomes a routine.

Do the “finger test” to avoid over watering – pop a finger in the soil. If it’s still wet, don’t water it. Over watering is a common mistake and the reason why house plants die.

When I go away on holiday, I fill my bath tub with about an inch of water and I lay old towels in the bath tub. I place all my house plants minus the saucers in the bath tub. I have left my house plants this way for up to five weeks over summer and they all survived.

WINTER GARDEN – WHAT I HAVE BEEN DOING IN THE GARDEN

There are maintenance jobs to do at this time of the year – pruning roses and feeding your spring bulbs with liquid fertilizer come to mind. I guess the leaf raking goes without saying because it is winter. Everything is so sodden and water logged so be careful when you tread on lawn – you don’t want to compact your lawn by walking on it too much. The other usual winter jobs in the garden are pruning lightly pruning any deciduous fruit trees and giving them a spray of neem oil.

If your roses are infected, it would pay to spray them with neem oil. In fact even your ornamentals can do with a spray of neem oil from time to time. It is also good time to plant summer lilies. Talking about planting – a few weeks back I planted garlic and potatoes. You are meant to plant garlic on the shortest day to harvest on the longest day. Both garlic and potatoes require heavy feeding and well-draining soil. I have planted some in soil and some in pots. Garlic is a first for me and seems promising with the shoots appearing already.

Seed potatoes and potato planter

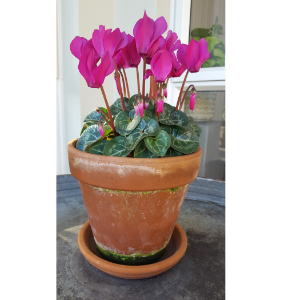
For winter colour, you can’t go past cyclamen and primulas. They are just so bright and cheery and once you plant, they require the odd feed once every few weeks and reward you with their cheerful blooms weeks on end.

Cyclamen

I do use a lot of herbs in my cooking so I have also planted Italian Parsley, sage and rosemary all in pots and placed them on the patio where the afternoon sun comes. I did the mistake of planting mint in my garden and it grows wild everywhere. Just as well I love the freshness mint delivers be it for sweet or savoury dishes or Friday night drinks so I don’t feel bad.

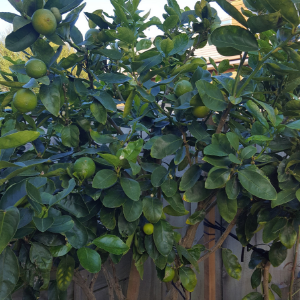
When I was working, I did not have enough time to care for my citrus and even though I have a few in the garden, they never fruited. Now I can tell you that I have learnt the art of taking care of them so they are fruiting abundantly. Here are my tips:

Lime tree looking healthy

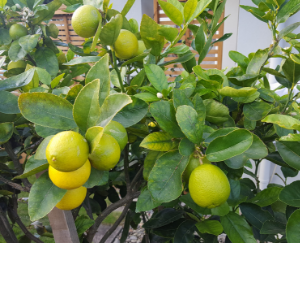
Citrus are hungry and big feeders. You may need to feed them with a citrus fertilizer three times a year. When the tree is giving out new shoots and flowers, I feed it a generous amount of Epsom salts (the variety you buy in the supermarket). Every time you feed make sure you spread the fertilizer around and water it in. During dry season, you must not forget to water once every few days at least. Lastly, I mulch them with pea straw – spread the pea straw around the tree leaving some space empty around the trunk. If you feel the leaves are curling, then give it a spray of neem oil.

Limes
Geranium

The geraniums I planted towards end of summer are still going strong and adding some brightness to the patio. I dead head them regularly and feed liquid fertilizer once every three to four weeks. A couple of months back they got a bad case of caterpillar infestation and yes I hand-picked the caterpillars out but also sprayed with my trusted neem oil.