Traditionally the term rendang does not refer to a type of dish. It actually refers to a method of slow cooking; stir-frying or mixing the ingredients continuously on a very slow fire for number of hours until they are devoid of any liquid. It was the judicious use of spices plus the cooking method that made the dish popular during celebrations and festivities. While rendang originated in West Sumatra, Indonesia it has spread throughout South East Asia. You can use meat, duck, chicken and even jackfruit to cook this way. This recipe is for chicken and thankfully my recipe does not cook for hours on end!!
5-6 shallots peeled and chopped
4-5 cloves of garlic chopped
5 centimetre piece of fresh ginger
5 centimetre piece of galangal
7-8 dried red chillies cut into 3-4 centimetre piece, seeds partially removed and soaked in hot water for half an hour
2 stalks of lemon grass (better to get fresh, if frozen thawed) outer sheaths peeled off and just the white inner core
100 grams grated coconut (fresh or thawed if frozen)
165 ml coconut milk
100 ml water
3 Kaffir lime leaves – remove the rib for one of the leaves and finely chop. Set aside for garnish
1 spoon of jaggery or brown sugar
1 teaspoon ground turmeric
500 grams skinless, boneless chicken thighs cut into about 4 centimetre pieces
1 tablespoon of vegetable oil
Salt to taste
METHOD
Using a food processor, grind together to a fine paste the shallots, garlic, ginger, galangal, red chillies and the lemon grass. Add a couple of tablespoons of water as needed.
In a large wok, roast the grated coconut until golden brown and set aside. This will take ten minutes. If you do it on high, you will burn the coconut so best over moderate heat frying regularly.
Heat the oil in wok and brown the chicken lightly in batches. You only need to oil the first batch as the fat from this is sufficient for the remaining pieces. Set aside.
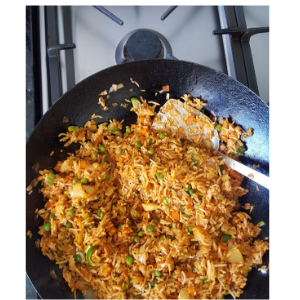
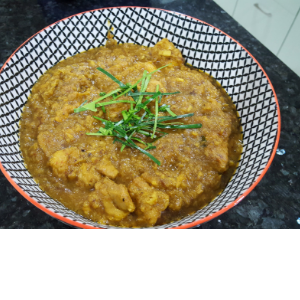
Put the spice paste in a wok along with coconut milk, turmeric, the two Keffir lime leaves, jaggery or brown sugar and the water. Bring it to a boil and allow to simmer for 20-25 minutes, stirring intermittently until the liquids have reduced to half the original amount. Now add the chicken and continue cooking uncovered for a further 10 minutes. Add the toasted coconut, stir and allow to cook for a further 3 minutes. Sprinkle the finely chopped Keffir lime leaf and serve with rice or Malaysian roti. Serves 4.
Cooking tips: The flavours develop the next day, so may pay to have it the next day. You can also double the spice paste and freeze one lot to make a different type of rendang later on.